The admin user can login through the admin panel or directly to Sales Office. All other users must login to the emerchant directory. For example: http://www.yourdomain.com/emerchant or http://www.yourdomain.com/ashop/emerchant depending on where AShop is installed. emerchant/index.html automatically redirects to emerchant/login.php
Upon login, mail is fetched from the customer email box, which is set in Sales Office Configuration. If spam blocking is not enabled all customer messages are moved to the customer messages inbox. If the spam blocking is enabled in Sales Office Configuration, then email that is from known senders is moved to the inbox and all other email is moved to the Spam Bin.
If the admin email setting, which is set in Configuration > Shop Parameters is set to the same address as the Sales Office customer email address, all admin notices will post directly in the Sales Office customer inbox (not sent by email to the POP3 mailbox). This method is more reliable and secure than sending admin notices by email and it reduces the load on the local mail server. If the addresses are different, the admin notices will be sent as regular email.
Customer Messages are received in two ways.
| 1. | The customer mailbox is checked and new messages are fetched automatically upon logging into the Sales Office and when the Messages page is opened. Email is fetched from a POP3 mailbox and the messages are then deleted from the POP3 mailbox. |
| 3. | Messages from contact forms are posted directly to this inbox. Admin notices also post directly to the Sales Office customer inbox if the admin email address is same as the Sales Office customer email address. |
How to Process Messages
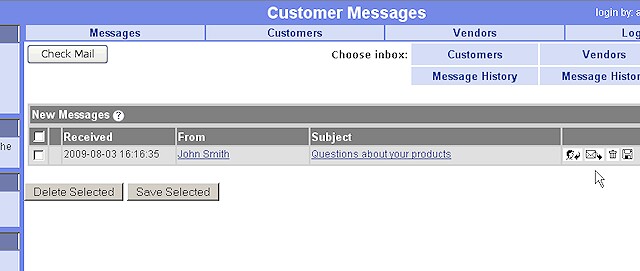
Use the icon/links on the right to reply, save, delete, view profile, and view history. You may view the sender's email address in the browser status bar by passing the mouse over the From field. Open a new message to the Sender in your local email client (for example Outlook) by clicking on the From field.

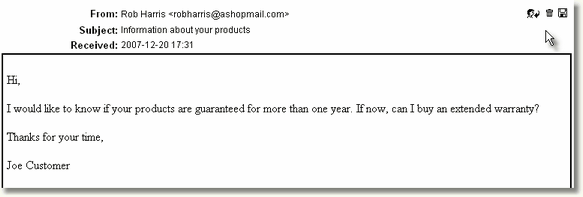
Open the view message window by clicking on the Subject line. There are also links in the view message window to reply, save or delete the message.

![]() When a Reply is sent, the original message and the reply are saved to the customer history. If a customer with that email address already exists, the messages are saved to that customer history. If there is not an existing customer with that email address, a new customer profile is created and the messages are saved to the new customer history.
When a Reply is sent, the original message and the reply are saved to the customer history. If a customer with that email address already exists, the messages are saved to that customer history. If there is not an existing customer with that email address, a new customer profile is created and the messages are saved to the new customer history.
![]() Forward the message (and attachment, if any). The forwarding window will open with the Sales Office customer address. Change it to the forwarding recipient.
Forward the message (and attachment, if any). The forwarding window will open with the Sales Office customer address. Change it to the forwarding recipient.
![]() Delete completely deletes the message.
Delete completely deletes the message.
![]() Save saves to an existing customer history or creates a new customer profile if there is not already a customer with that email address.
Save saves to an existing customer history or creates a new customer profile if there is not already a customer with that email address.
![]() Customer Profile icon/links only appear for existing customers. They link directly to each customer's contact information.
Customer Profile icon/links only appear for existing customers. They link directly to each customer's contact information.
![]() Customer History icon/links only appear for existing customers. They link directly to each customer's history.
Customer History icon/links only appear for existing customers. They link directly to each customer's history.
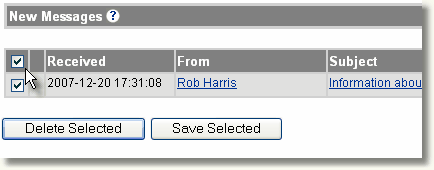
To Delete or Save Multiple Messages, click the checkbox to the left of each message to select specific messages or click the checkbox at the top of the column to select all of the messages. Then click on delete or save button at the bottom.

Check Mail while logged in by clicking on the Check Mail button in the Messages page. There is also a check mail link on the left in the tool bar, which appears in every Sales Office page.

Message History
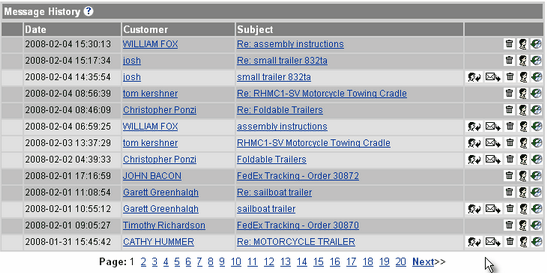
To view previous customer messages in chronological order, click on the Message History link.

Shortcut icon/links provide direct access to related customer information and to process the messages. Use the page links at the bottom to browse message history by page number or previous/next page.
