Customers may upload a file following an order placed through the shopping cart. The file upload is controlled by a script named buyupload.php, which only allows one file upload for each order and only allows specific file types. The script works with a mySQL database table to keep track of file uploads. A file upload notice is emailed to a specified address when a file upload has occurred. An automation fulfilment option is used to activate the buyupload.php script after payment is completed.
Setup instructions:
1. Create a new MySQL database or add a table to an existing database if one is available that does not already have a table named "uploads".
2. Edit the automationexamples/buyupload.php script with a text editor to set the configuration options. The $savepath variable must be set to the full filesystem path to the directory where the uploaded files will be saved. The $password variable is used to make sure that only you or your AShop scripts can add new allowed uploads to the database. The database variables should be set according to what you use to login to your MySQL database. The $allowedfiletypes can be set to a comma separated list of file extensions. If none are set, any type of file will be allowed. The $notifyemail variable should be set to an email address where you will receive notifications of uploaded files.

3. Run the automationexamples/buyupload.php script in a web browser to install the database table.
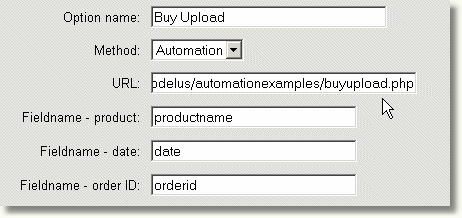
4. Login to your AShop admin panel and open the page Configuration->Fulfilment.

5. Add a new Automation fulfilment option and set its' URL to where the buyupload.php script is located on your site.

6. Ensure that the Fieldname - order ID is set to: "orderid".
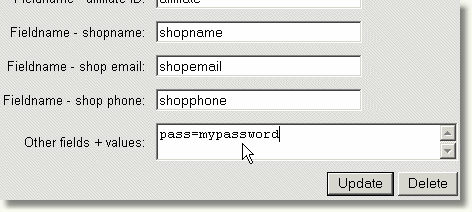
7. Enter the text: "pass=mypassword" (changing the "mypassword" part to what you set the $password variable to in the buyupload.php script) in the text box labeled: "Other fields + values" and click Update to save the settings.

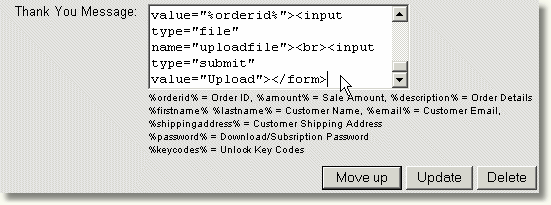
8. In Configuration > Payment, edit the Thank You Message for the payment option(s) and add the following html code:
<form action="automationexamples/buyupload.php" method="post" enctype="multipart/form-data" name="productform"><input type="hidden" name="orderid" value="%orderid%"><input type="file" name="uploadfile"><br><input type="submit" value="Upload"></form>
Make sure that the action parameter of the form tag contains the right URL to your buyupload.php script if you have placed it in another directory than the default on your site.

10. Add fulfilment to product(s), which when sold will allow the upload. Click the Fulfilment button for the new product and select the new automation fulfilment option.

When a customer buys the product the order ID will be added to the upload database table. The thank you page presented to the customer
after payment will contain a text entry box and a browse button, which the customer may use to upload a file. An upload notice is emailed to the address that is set in buyupload.php.
